

Remove Screen Passcode, Apple ID, and Screen Time Passcode from iPhone
iPhone Passcode Tuner is a Windows application designed to unlock lock screen without password on iPhone. It also helps directly remove the forgotten passcode of screen time restriction and remove Apple ID from your iPhone.
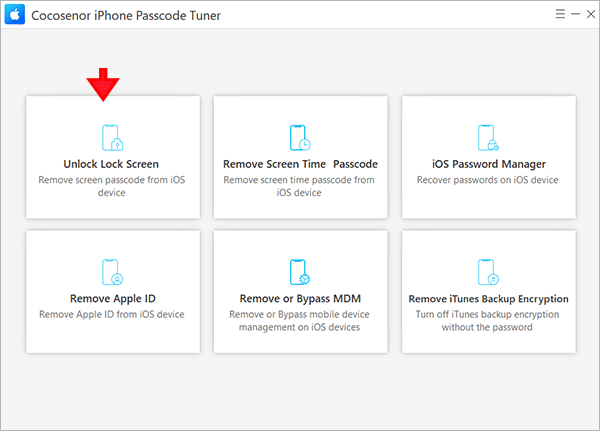
Features Cocosenor iPhone Passcode Tuner:
- Remove the forgotten screen password to unlock iPhone.
- Reset your iPhone to a brand new one to remove all password restrictions.
- Totally delete the existing Apple ID/iCloud account from your iPhone without a password.
- Remove passcode of iPhone Screen Time limitation without data loss.
- Compatible with all versions of iOS.
- Try the software for free
How To Use:
Step 1 Run iPhone Passcode Tuner
1. Download iPhone Passcode Tuner.
2. Install it on your computer and launch it.
Note: Install iTunes to make sure the iPhone devices could be detected.
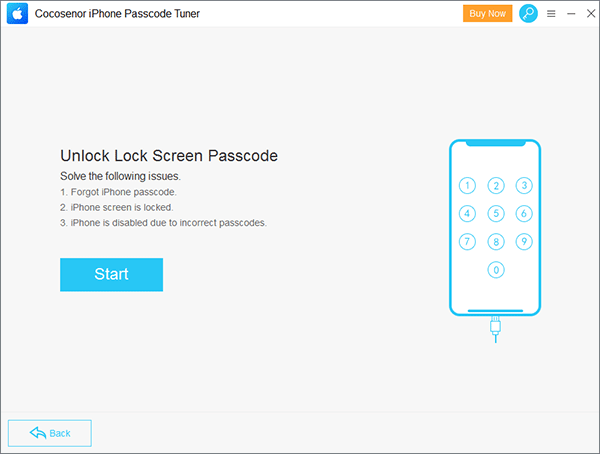
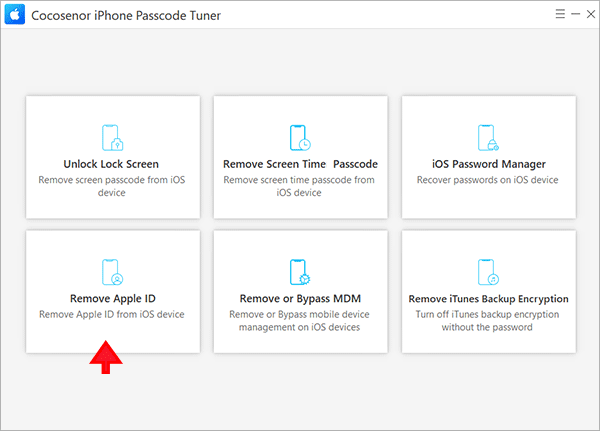
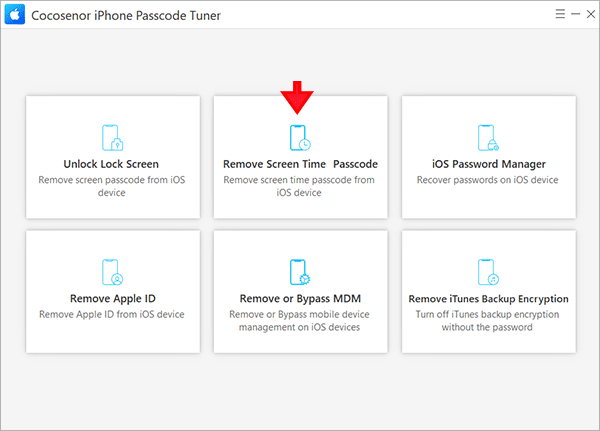
Step 2 Click "Unlock Lock Screen" from the interface
1. Click the "Unlock Lock Screen" from the interface.
2. And then click the Start button in Unlock Lock Screen Passcode.
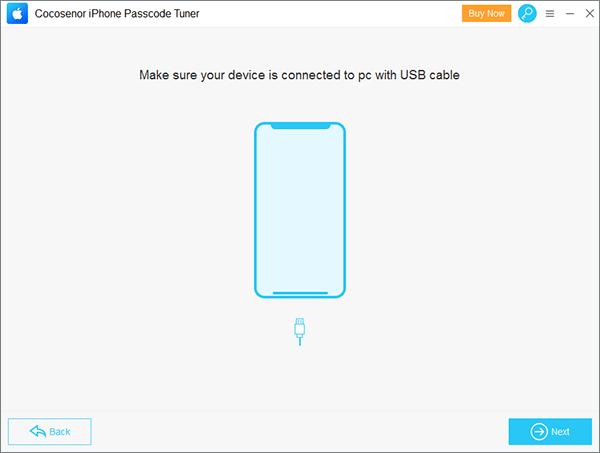
Step 3 Connect the iPhone device to the computer
1. Use USB cable to connect your iPhone to the computer.
2. Then click Next and the software will scan your iPhone.
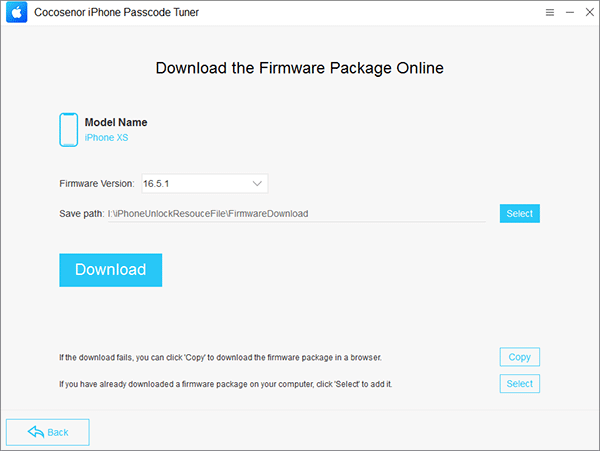
Step 4 Download the firmware package to Unlock iPhone
1. After detecting your iPhone, click Download to get the firmware package for your locked iPhone.
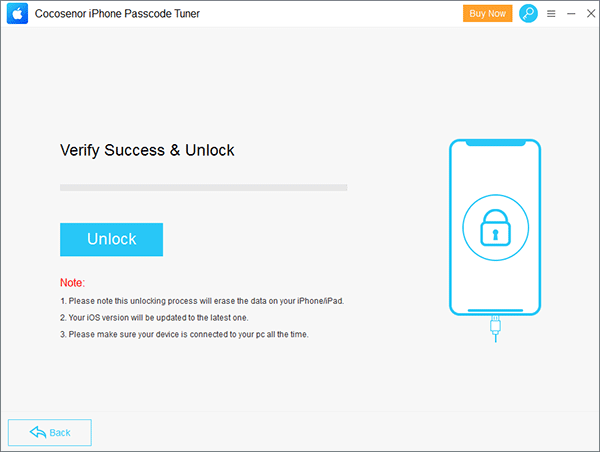
Step 5 Click Unlock to start removing the screen passcode.
Note:
* All the data of this iPhone will be erased.
* Your ios version will be updated to the latest one.
* During the process of Unlock, your iPhone device should be kept connected with the PC.
Part 2: Remove Apple ID from iPhone
Step 1 Click Remove Apple ID of the interface
1. Click the "Remove Apple ID" of the interface.
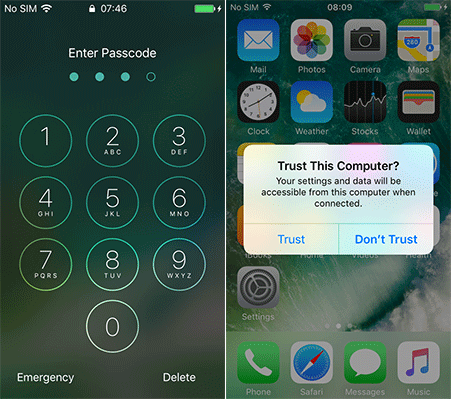
2. Connect your iPhone to the computer.
3. Keep the iPhone unlocked and confirm the notification by hitting Trust on your iPhone.
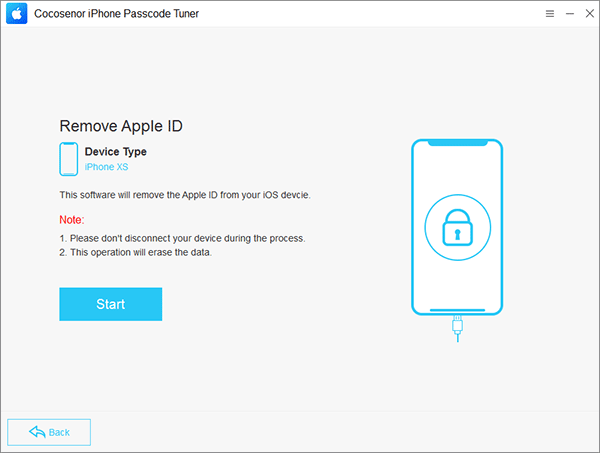
Step 2 Click Start to remove Apple ID
1. Click Start. The operation will erase the data on your iPhone.
Note:
* All the data of this iPhone will be erased.
* During the process, you should keep the iPhone connected with the PC.
* If "Find My Phone" is disabled on your iPhone, it will immediately start to remove Apple ID once you click the Start button.
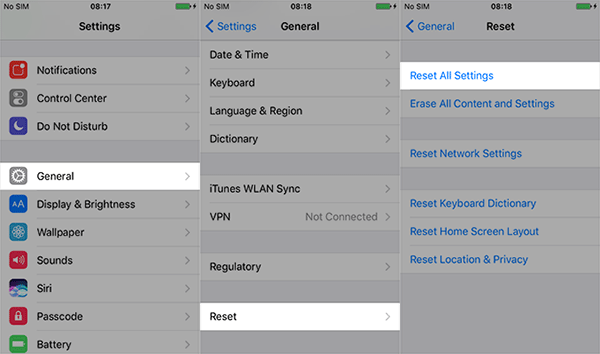
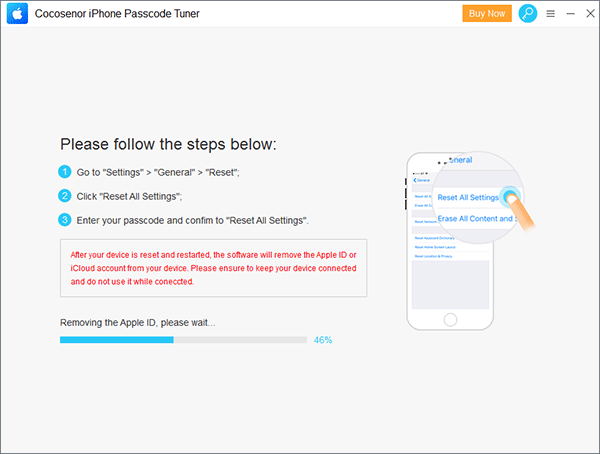
2. If your Find My iPhone function is turned on, you should go to Settings > General > Reset >Reset All Settings to reset all settings.
3. Once you reset all settings on the iPhone, the software will automatically start removing the Apple ID. Keep your iPhone device connected during the process. Then wait for it to complete.
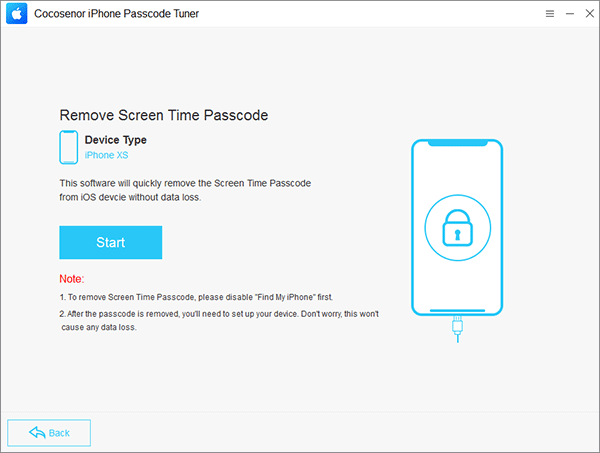
Part 3: Remove Screen Time Passcode from iPhone
You should pay attention that this feature can only apply to iOS 12 iPhones. After you delete the screen time password, you can continue to use this iPhone for this operation will not cause any damage to the data.
Step 1 Click Remove Screen Time Passcode of the interface
Step 2 Click Start to remove screen time passcode
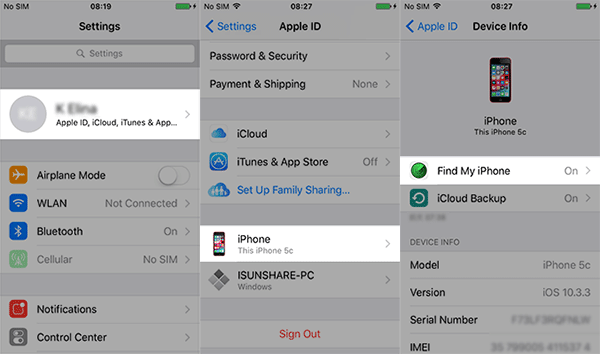
1. Disable the Find My iPhone function on your iPhone device. Go to Setting > Apple ID > Device Info > Find My iPhone, and then enter the Apple ID password to turn off Find My iPhone.
2. Then connect the iPhone to the computer, enter the screen passcode and Trust this computer. Next, click Start to remove the screen time passcode.
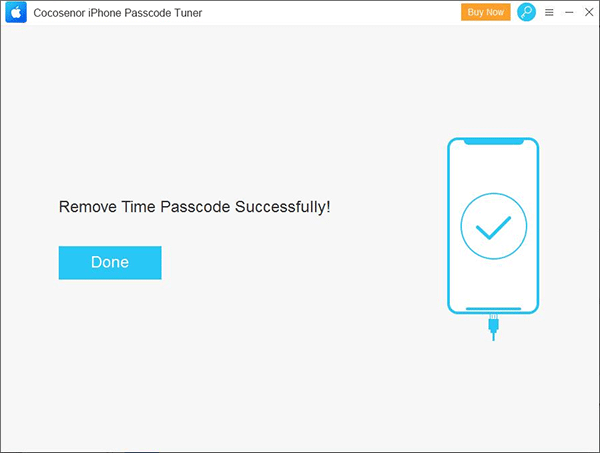
Step 3 The screen passcode is successfully removed with no data loss.
Minutes later, you will get the successfully message. At the same time, your iPhone is restarted. Now, you can go to change whether the screen time passcode is removed or not.


![Unlock Tool 2026.05.04.0 Released [Latest Version]](https://blogger.googleusercontent.com/img/a/AVvXsEiybNFqJPBiI-QDL-WNuv813C6nPcquxVmcGGdQrgUv20B8dkwoo8xzvjoDx3Iv3QjgNgvSxjhyVLWCeQxGFBCNXj35bTauYLrM1VyFcTT6JT8Sn3kw2SWDw-Auz_Fo7D7xtEHvMKMwLqsvZ_R20A23yefK3aahcgywEkYU_W3aiBJGh3RFBTbjVWTpEF4-=w100)


0 Comments
Do Not Send SPAM Link !!!!