In this tutorial, we will show you how to root the OnePlus Nord device without using TWRP Recovery. The entire process will be carried out by extracting the stock boot.img file, patching it via Magisk and then flashing it via the necessary fast boot commands. Furthermore, we have also uploaded two stock boot.img files for different regions.
If it qualifies for your region, you may directly use that file and head over to the repair directions. Otherwise, we'll conjointly list out the step by step directions to extract and patch the boot.img file. you will ask those steps too. simply to air a safer aspect, we might advocate you to travel with the latter one, i.e manual extraction. this can certify that there isn’t any code version conflict. There is no denying the very fact that OnePlus devices square measure glorious to produce feature-rich devices at a reasonable worth. And continued this tradition is their latest giving. Dubbed because the OnePlus Nord, it beholds a reasonably sturdy specs sheet and will place several mid-rangers to shame. There square measure several reasons to justify these claims of ours. And one ought to look no more than the specs that it's for the plenty. While there square measure so quite spectacular options for a tool priced within the mid-range, nonetheless you may think about this to be the entry purpose. There square measure an embarrassment of customizations on the market watching for you at the opposite aspect of the gate. And during this guide, we'll assist you to fill the use of these tweaks. therefore while not more stir, here square measure the desired directions to root OnePlus Nord while not mistreatment TWRP Recovery. Follow on
How to Root OnePlus Nord without TWRP (using Patched Boot file)
Before we list out the steps for that, there are a few prerequisites that your device needs to qualify. Make sure to go through each of these points before proceeding ahead.
Create a complete backup of your Nord device. Although rooting in itself doesn’t wipe the data, but it is always recommended to be on a safer side.
Furthermore, your device’s bootloader should also be unlocked. If you haven’t done so, refer to our detailed guide on How to Unlock the Bootloader on OnePlus Nord.
Likewise, download and install the Android SDK Platform Tools onto your PC. This will be required so as to execute ADB and Fastboot Commands. The ADB commands will be needed to boot your device to Fastboot Mode. The latter will be needed to execute fastboot commands to flash the patched boot file.
Don’t forget to enable USB Debugging on your Nord device as well. This is needed so that your PC successfully recognizes your device is successfully recognized in ADB Mode.
Now that we are done with the requirements section, download all the necessary files from the below section and proceed with the steps to root your OnePlus Nord.
Downloads
Get hold of the Magisk Manager APK file. We wouldn’t be needing the Magisk Installer ZIP file for this tutorial, just the APK file will be sufficient.
However, if the stock boot.img file for your firmware version/region isn’t available, not an issue. We have listed detailed steps on how to extract and patch that file. Follow the below steps for that.
These were all the files that we would be needing for this guide. You could now proceed with the steps to root your OnePlus Nord. As the saying goes “Droidwin or any of its members won’t be held responsible if your cat ends up damaging your device, there is a thermal nuclear war or you end up with a bricked or boot looped device”. However, in the case of the latter, you may drop in your queries in the comments section below. We would definitely help you out.
STEP 1: Getting the Stock Boot.img File
If your device variant matches with the stock boot.img file that we have provided above, then you could easily use that. Otherwise, follow the below steps to extract the stock boot.img file.
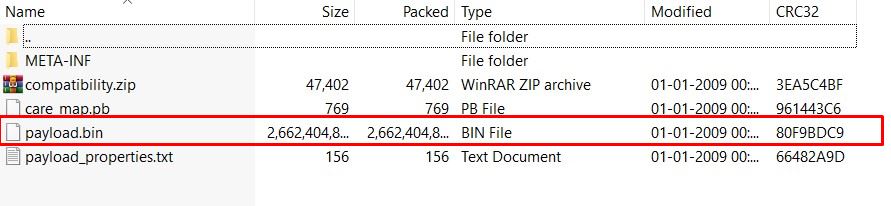
The thing is you couldn’t directly get a hold of the stock boot.img file. Earlier OEMs used to provide all the files as in, but now they have been further packed inside the payload.bin file. So you will have to extract that file first and from there you could access the boot file.
It is now time to patch it via Magisk. After this, we will flash this file on to your OnePlus Nord using fastboot commands and hence root it. Follow along.
STEP 2: Patch Stock Boot.img via Magisk
Now that you have got your hands on the stock boot.img file, it is time to patch it via Magisk. Follow the below steps for that:
Transfer the stock boot.img file to your device.
Launch the Magisk Manager app and tap on Install next to the “Magisk is not installed keyword”, as shown in the image.
Again tap on Install in the popup that appears.
Next, tap on Select and Patch a File.
Browse to the boot.img file and select it.
Magisk will take a few seconds to load that file and will then patch it. The entire process shall only take a few seconds.
Once that is done, head over to Internal Storage > Downloads folder and you will find the magisk_patched.img file.
So with this, you have successfully patched the stock boot file. It is now time to flash it onto your device. Here is how to do so.
STEP 3: Flash magisk_patched.img onto OnePlus Nord
We will be now using the fastboot commands to flash this patched boot file onto your device. For that, make sure that you have installed Android SDK Platform Tools on your PC.
Connect your device to PC via USB Cable. Make sure that USB debugging has been enabled.
Transfer the magisk_patched.img file from your device to the platform-tools folder.
Inside the same platform-tools folder, type in CMD in the address bar and hit Enter. This will launch the Command Prompt.
Execute the below command to boot your OnePlus Nord to the Fastboot/Bootloader mode:
adb reboot bootloader
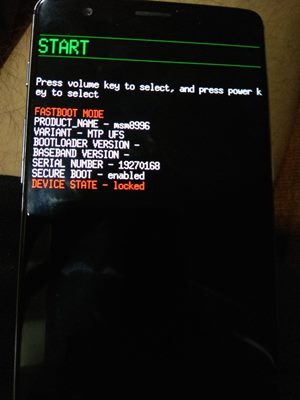
Fastboot Mode on OnePlus. Credits: OnePlus Forum
Once your device is booted to fastboot mode, type in the below command to check for the active slot:
fastboot getvar current-slot
If the result comes out to be Slot A, we will be installing the magisk_patched.img to this slot as follows:
fastboot flash boot_a magisk_patched.img
On the other hand, if it is Slot B, the magisk_patched.img file will be flashed to this slot using the command:
fastboot flash boot_b magisk_patched.img
Once the file has been flashed, you may reboot your device to the system using the code:
fastboot reboot
That is it. These were the steps to root your OnePlus Nord device. While the steps might seem to be quite lengthy, but trust us, this is quite an easy method. Just follow the steps as mentioned and you should have no trouble whatsoever. However, if you get stuck at any steps, do let us know your queries in the comments section below. We will get back to you with the fix in no time!


![Unlock Tool 2026.05.04.0 Released [Latest Version]](https://blogger.googleusercontent.com/img/a/AVvXsEiybNFqJPBiI-QDL-WNuv813C6nPcquxVmcGGdQrgUv20B8dkwoo8xzvjoDx3Iv3QjgNgvSxjhyVLWCeQxGFBCNXj35bTauYLrM1VyFcTT6JT8Sn3kw2SWDw-Auz_Fo7D7xtEHvMKMwLqsvZ_R20A23yefK3aahcgywEkYU_W3aiBJGh3RFBTbjVWTpEF4-=w100)


 (Unlocked Bootloader From Command Prompt))
0 Comments
Do Not Send SPAM Link !!!!