

For more updates and latest tools, subscribe to our Telegram channel.
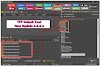
Join Telegram ChannelTWRP Installer REDMI 8 New Method With All Required Files...
In this post today I have the solution of installing TWRP Recovery on a Redmi 8 device. the method is working 100% I am personally trying you also try and post result. if you unlock your bootloader then this method is working.

I want to share my tool for installing TWRP for Redmi 8. Tested on MIUI 11 Global 11.0.10.0 (PCNMIXM). Always take a backup of your data before doing this modification. I'm not responsible if something went wrong and do it at your own risk!!!
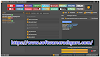
About this tool:
- ✔Includes Official TWRP for Redmi 8
- ✔Includes ADB and Fastboot
- ✔Easy to Use
What is Custom Recovery?
A custom recovery is a third-party recovery environment used to get the features that were limited while using stock recovery. It is an interface that helps the user to interact with the recovery environment. It carries some additional features to the stock Android recovery.
There is a wide variety of custom recoveries that are available for the Android system. However, TWRP, Philz, RedWolf, and OrangeFox are some prominent custom recoveries available for Android devices.
Advantages of Custom Recovery
- Brings the ability to flash custom Recovery
- Allows to root Android system with Magisk or SUperSu
- Enables System Backup and Restore
- Ability to flash third-party custom ROMs
- Ability to Customize the system
- Features an ability to flash custom MODs
How to Install TWRP & Root:
- Unlock the Bootloader.
- Connect your phone with the USB cable and put the Magisk zip file to your internal or SD Card
- Turn off your device and reboot into fastboot by pressing Vol down and Power button
- Extract the TWRP installer zip file
- Open TWRP_Installer.bat
- Press Enter to proceed
- Then press any key to install the TWRP and wait to finish
- Press any key again , it will automatically boot into TWRP
- Go to Install
- Find the Magisk Zip File then flash
- Reboot and your done
- Congratss!!! You successfully install TWRP and Root your Redmi 8
Notes:
👏CREDIT:
- XDA
- Xiaomi Redmi 8 Developers
- TWRP

![Unlock Tool 2026.04.12.0 Released [Latest Version]](https://blogger.googleusercontent.com/img/a/AVvXsEjgyTLRSeYkzBghFaC8DYSCU4GpUixJSJSSWSxPDKFZpUSt8kcBJnx9dcNBaimpCY-jRYaIy54hEYj3BkPMjJgKcKdKREEOrL1bbkpOe5GvCR9ic3-1t6yEoUc_EzsYeztMhXSPOH-A67UwAqqm4-39Tjlng5k0K5hxiPRmdnmoEtZ1qRvKv4O8Rxmxw4VS=w100)


0 Comments
Do Not Send SPAM Link !!!!