

For more updates and latest tools, subscribe to our Telegram channel.
Join Telegram ChannelMoto Tab G70 FRP Removal Guide (With Tool File by GSMRK)
If you forget your user lock and format your MOTO Tab G70 using recovery, in this situation, you will be locked by FRP (Factory Reset Protection). FRP lock is a security feature by Google on Android 5.0 and above devices that come with this option. Now, how can you get back into your account? If you have your Google account login information available, then simply enter it and log in. However, if you have completely forgotten it, then you will need the FRP file method. I have clearly mentioned all the steps below. Follow them to unlock your device..

⚠️ Disclaimer:
This guide is intended for educational purposes only. Bypassing FRP on a device you do not own or have proper authorization for may be illegal in your region. Proceed at your own risk.
🔧 Required Files & Tools
Download Contents (Password: GSMRK):
- ✅ Moto Tab G70 FRP File
- ✅ MTK Flash Tool v5.2104_P522
- ✅ Auth Bypass Tool
- ✅ Android Utility Tool (for verification and ADB access)
- 🔗 Download Link: Click Here
📝 Step-by-Step FRP Removal Instructions
1. Prepare Your PC
- Install MediaTek USB Drivers if not already installed.
- Disable Windows Driver Signature Enforcement (if needed).
2. Extract the Tool Package
- Unzip the downloaded package using the password:
GSMRK You should see the following files:
- Moto Tab G70 FRP scatter file
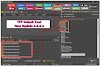
- MTK Flash Tool (v5.2104_P522)
- Auth Bypass Tool
3. Bypass the MediaTek Auth Protection
- Run the auth bypass tool.
- Connect the powered-off Moto Tab G70 via USB.
- The tool will establish a handshake and bypass authentication, allowing Smart Flash Tool to communicate with the device.
4. Load FRP File in Smart Flash Tool
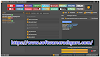
- Open Smart Flash Tool.
- In the "Download" tab, load the scatter file from the Moto Tab G70 FRP folder.
- Only the FRP partition should be selected.
- Click Download.
5. Flash the FRP Partition
- With the device still connected, wait for the flashing process to complete.
- You should see a green checkmark indicating success.
6. Post-Flash Steps
- Disconnect the device.
- Power it on.
- The device should now boot without asking for the previously synced Google account.
✅ Final Notes
- Use the Android Utility Tool to confirm FRP status or to activate ADB if needed.
- If the process fails, repeat the auth bypass step and ensure the correct drivers are installed.

![Unlock Tool 2026.04.12.0 Released [Latest Version]](https://blogger.googleusercontent.com/img/a/AVvXsEjgyTLRSeYkzBghFaC8DYSCU4GpUixJSJSSWSxPDKFZpUSt8kcBJnx9dcNBaimpCY-jRYaIy54hEYj3BkPMjJgKcKdKREEOrL1bbkpOe5GvCR9ic3-1t6yEoUc_EzsYeztMhXSPOH-A67UwAqqm4-39Tjlng5k0K5hxiPRmdnmoEtZ1qRvKv4O8Rxmxw4VS=w100)


)
0 Comments
Do Not Send SPAM Link !!!!