RockChip Batch Flash Tool 1.8 [FREE TOOL]!!!
From this tutorial, you'll transfer the Rockchip Batch Flash Tool and flash the computer code onto your device. whereas most of the devices either associate with flower, MediaTek, or Exynos chipsets, some devices even have the Rockchip because of the underlying chipset. And for those sets of devices, this package will certainly are available in handy. It provides a handy UI to flash the stock computer code file onto these devices. All the RockChip chipset-powered devices (RK2918, RK3066, RK3188) might take full advantage of this tool.

Well, not solely within the traditional boot mode, however, a number of its functionalities might even be used once the device is in an exceedingly boot loop or bricked state. however before we have a tendency to list out the steps to flash the device-specific computer code, let’s 1st cross-check what all the Rockchip Batch Flash Tool needs to supply to the user. After this, you'll grab hold of the same tool’s varied build version so proceed with the installation/flashing directions. thus while not any fuss, let’s begin with the guide.
Features RockChip Batch Tool:
Portable Application:
It comes as a transportable application, which implies you don’t ought to install the RockChip Tool on the pc to use it. transfer and extract the tool on the pc and open RKBatchTool.exe to Launch the tool.
Flash Firmware:
It permits you to flash or install stock code on the devices hopped-up by RockChip Chipset. Launch the RockChip Tool on the pc, and cargo the stock code within the tool. when loading the code, connect the device to the pc and click on on the Upgrade or Restore button to start the flashing method.
Supports Rockchip Devices:
It comes in support of the devices hopped-up by Rockchip Chipset. Once you've got put in the right Rockchip Drivers on the pc, Rockchip Tool will simply find the connected Rockchip Devices and obtainable to flash or install the code on the device.
Support .img Format:
It supports flashing or putting in the .img primarily based stock code on the devices hopped-up by Rockchip Chipset. you'll realize the .img get in the stock code of your RockChip device free by the corporate.
Drivers
It supports auto drivers install only you need to open the driver's folder from the tool and click and run the setup file. is a 2 to 3 minute take time for install driver.
How To Use?
To begin with, you will have to install the USB drivers for your device. So download the drivers for your device from the above-linked post.
Then connect your device to PC and search for Device manager from the Start menu.
Scroll to the Other Devices section and your device should be mentioned as Unknown or Other Device.
Right-click on it and select Update Drivers.
update USB drivers
In the next popup that appears, select Browse my Computer for Updated Driver software.
browse PC USB drivers
Then click on the Browse button and if you are having an older device, then click on the Browse button and select the entire USB drivers folder.
load USB drivers
On the other hand, the newer Android devices should select the Let me pick from a list of device drivers on my computer.
Next up, select Show all devices and hit the Next button.
show devices
Click on the Have Disk button situated at the bottom.
USB-Drivers-Have-Disk-option
Then click on Browse and navigate to the downloaded USB driver’s folder. There you will find the android_winusb file, select it and click on OK.
android-winusb-inf-file
Select the Android Bootloader Interface and click the Next button.
Android-Bootloader-Interface
The installation process will now begin and it should be completed within a few minutes.
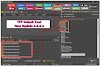
STEP 2: Load Firmware IMG file to Rockchip Batch Flash Tool
Now that the necessary drivers are installed, it's time to load the firmware file to the Rockchip Batch Flash Tool.
Launch the tool by double-clicking on the RKBatrchTool.exe file.
Then right next to the FW path field, you will see a button with three dots. Click on it.
load firmware
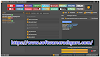
Navigate to the IMG firmware file and load it onto the tool.
firmware img file
Once that is done, you should see the following sections getting populated- Firmware Version, Firmware Time, Support Chip, Boot Version, and Boot-Time.
firmware loaded Rockchip Batch
STEP 3: Connect your Device to PC
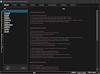
You now have to connect your Rockchip chipset device to the PC. For that, turn off the device.
Then press and hold the Power, Volume Up, and Down button together.
After two seconds, release the power and volume up button, but keep pressing the volume down button.
You should do so until the Connected Device shows a green symbol. When that is done, release the Volume Down.
device connected rockchip batch
For some other devices, you might have to press the Volume button and while it stays pressed, press the Power button.
Then and when the Connected Device shows a green symbol, release the buttons.
STEP 4: Flash Firmware File
Now that the device is recognized by the Rockchip Batch Flash Tool, you could begin with the flashing part.
To do so, click on the Upgrade button situated at the bottom.
upgrade
While the flashing process is going, the green symbol will turn yellow and will continuously blink as well.
firmware installation
The entire flashing might take up some time to complete. When that is done, you may reboot your device.
README:
Compatibility: The tool runs perfectly on Windows XP, Windows Vista, Windows 7, Windows 8, Windows 8.1, and Windows 10 (32 bit and 64 bit).
Take a Backup: If you are willing to try the above tool, then please take a backup of your personal data from your Android Smartphone or Tablet. As flashing any Firmware or recovery may brick the device.
Credits: RockChip Batch Tool is created and distributed by the developer. So, full credits go to the developer for sharing the tool for free. 


![Unlock Tool 2026.04.12.0 Released [Latest Version]](https://blogger.googleusercontent.com/img/a/AVvXsEjgyTLRSeYkzBghFaC8DYSCU4GpUixJSJSSWSxPDKFZpUSt8kcBJnx9dcNBaimpCY-jRYaIy54hEYj3BkPMjJgKcKdKREEOrL1bbkpOe5GvCR9ic3-1t6yEoUc_EzsYeztMhXSPOH-A67UwAqqm4-39Tjlng5k0K5hxiPRmdnmoEtZ1qRvKv4O8Rxmxw4VS=w100)


0 Comments
Do Not Send SPAM Link !!!!